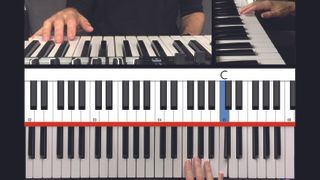
When it comes to playing your piano, digital piano or MIDI keyboard, it's not just about knowing the notes. You also need to make sure that your fingers are strong and fast enough to land in the right places at the right times, and that's where exercises can help.
So, read on and get ready to give your hands a workout...

Step 1: These exercises involve playing the notes in the chord one at a time. So, instead of playing all three notes in the chords at once, we play them as ‘broken’ chords. Starting in C major triad position, play C, E and G one after the other.

Step 2: Time to move on up to the next chord. After playing the G, while still holding the key down, move your thumb over to the right slightly to cover the D key. This will get you into the correct position to play the next chord up, a D minor broken chord. Follow up the D with the other two notes in the chord, F and A.

Step 3: With finger 5 on the A key, tuck your thumb under again to cover the E key and play the E minor broken chord (E, G, B), then continue in a similar way up the scale as in the previous exercise. At the top, reverse the order of the broken chords (eg. play G, E, C not C, E, G) and work back down to the starting point.
A 3-4-5 Special

Step 1: One problem area that many keyboard players face is developing strength and dexterity in fingers 4 and 5, so this variation of the five-finger scale exercise gives those fingers more of a focussed workout. Begin by adopting the C major five-finger scale starting position once more, thumb on C, finger 5 on G.

Step 2: Now perform the same five-finger scale exercise but using only fingers 3, 4 and 5. Start by playing E with finger 3, then go smoothly to play F with finger 4, then G with finger 5, then F again and back to E. The goal is to get all three notes down clearly with equal loudness and zero sticky-out thumb and finger 2!

Step 3: Once comfortable with this, bring in the left hand, first alone and then simultaneously with the right. For the left hand, start with finger 5 on C, finger 4 on D and finger 3 on E. Focus on getting the timing spot on with both hands synchronised, and getting finger 4 down without finger 2 pointing at the ceiling.
Arpeggio exercise - C major arpeggio

Step 1: Essentially an extended broken chord, this C major arpeggio exercise is another great one for speed and dexterity as it involves a larger thumb tuck than just playing the scale. Because of this, it uses a different fingering for the notes – thumb on C, finger 2 on E and finger 3 on G. Play these notes one after the other.

Step 2: Using finger 3 as a pivot off the G key, and keeping your hand horizontal, pass your thumb under your palm to play the C key an octave up from where you started. This super thumb tuck is a stretch, but stick with it – the idea is to get your hand in position to be able to continue the arpeggio through the next octave.

Step 3: As you play C, swing the rest of your hand back over the thumb to play the next notes E and G smoothly, using fingers 2 and 3 as before, then hit the high C with finger 5. Go down again, using the same fingering, but now pivot off the C and pass your hand over your thumb to hit G with finger 3, and continue down to finish on C.


